When I was a newbie in photography, I experimented with anything and everything. There was only one thing I had to practice more than the expected amount of time – camera lighting. I loved playing with off-camera lighting but wasn’t aware of what I needed or where to start! So then I started experimenting with different features and external flashes.
I’m sure many of you are facing the same problem. Canon flashes can solve all your issues regarding lighting. Read this article and get a step-by-step guide on how to use Canon flash on your beloved camera.
Have these things before we begin;
- Canon DSLR with the built-in wireless flash function.
- A compatible Speedlite that can be set to slave.
- another Speedlite. (Optional if you want to use more than one light at a time).
This article primarily tells you how to set up the flash system with the external flash on a Canon DSLR. In general, the menu is very similar or almost identical on all cameras, and it is present on all models on the market today. So don’t worry, you will be able to set up the flash even if you have some other models.
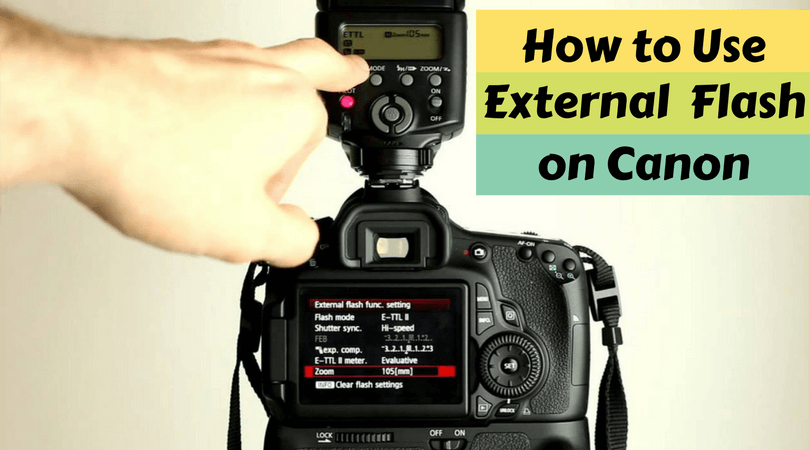
How to Use External Flash on Canon?
Step 1: First of all, let’s make sure that the camera is set to manual mode. You can find it on the setting dial, which is usually present on the camera. It gives us complete control.

Step 2: We also need to make sure that we have a flash on the hot shoe with very fresh batteries. It also needs to be activated. It gives us sync with our camera. So we’re going to turn it on.

Step 3: Now, we’re going to go into the menu setting. (Here, go to the first icon of the camera).

Step 4: After that, we should scroll down to where it says “Flash Control”. And when we have done that, we should press the “Set” button.
Step 5: After setting the flash control, we need to scroll down to set the external flash. Again, get the ‘set’ button. We need to have it so that we can work with a flash.
Here you have either the ‘Manual’ or ‘TTL’ setting. I always set it to ‘Manual’ as I’m an old hand, but it’s up to you what you want to choose or which option you feel comfortable with!
Step 6: Then, we can change the power of the flash. This controls the power of your flash, regardless of your setting on the flash. So if I reduce the power ratio down to 1/8 or 1/16, then the camera will only allow that power to flash.
We should always ensure that we have that amount of power that we want our external flash to fire at.
Note: I usually want it to one-to-one, and so I can manually change it on the flash screen itself. That way, I can override it on the flash and not on the camera. But if you’re going to do it this way, you’ll want to turn it off as soon as you set it and also save it for any future shooting situations.
Step 7: If you want to add another flash to the configuration, just set the second Speedlite as a slave on the same channel and sync it.

Now that we know how to set up the external flash on the camera let’s review how to use this flash.
How to Use External Flash on Canon?
Once you have set up the external flash on your camera, try a few shots with it and see if you get the finesse you want. Practice makes perfect, so don’t hesitate to try a few shots before you get that one shot that’s worth it. You can change the light settings, the angle of the flash, the speed ISO, the shooting mode and much more. Once you have your external flash set up, use the settings and tweak them to your liking.
Although cameras come with built-in flashes, there are some limitations to working with them. For this reason, most photographers recommend using an external flash. For better understanding, we have listed the advantages and disadvantages of in-camera and out-of-camera flashes.
Pros and Cons of Using on-camera (Built-in) Flashes

Pros and Cons of Using an External Flash

Concluding Remarks
Bottom line. These are the basics of how to use the best Canon flash with Canon DSLRs. I won’t be surprised if you find other ways to do it faster, but in my opinion, this is the easiest way to configure the external flashes. I hope you also find this approach helpful and straightforward. Keep arming yourself with lots of experiments. Click and make beautiful memories!